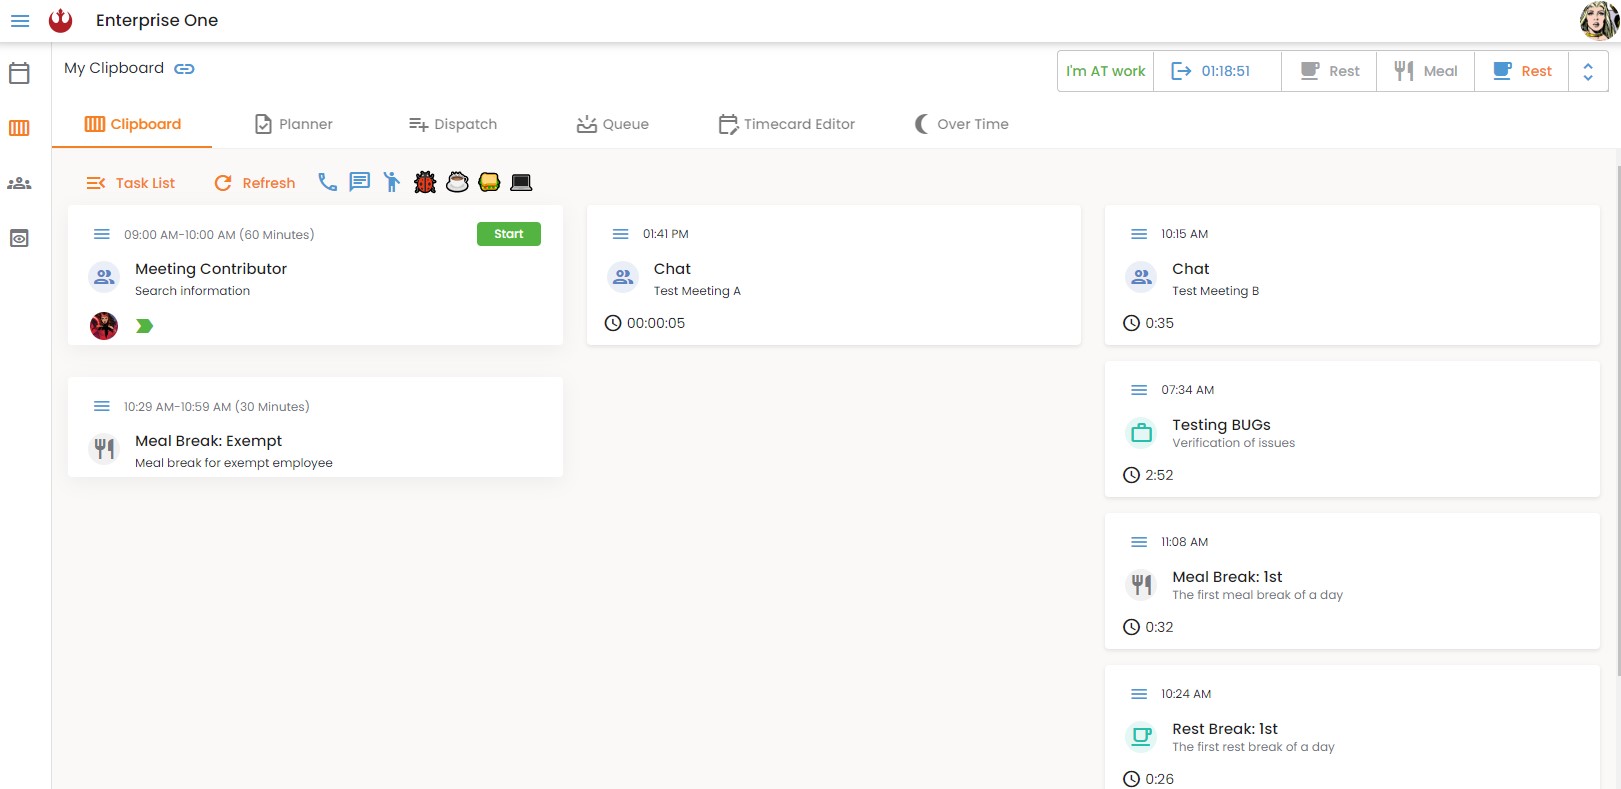
How to manage the Clipboard 1 1

The main feature is the clipboard, where the team can execute all the tasks, and control everything from planners, dispatch, task queues, time-card editor, and overtime.

Clipboard
- How to start a task on the clipboard?
To start a task, go to the clipboard, click on the task list, select the task you wish to add, and click start. You can also choose to start the task immediately, add it to the planner, or add it to your favorite list.
💡 Note: Repeat the process when adding a task either business, learning, or personal tasks.
Adding of Insta List / Add to favorites - You can choose to add your favorite or most used task to the insta list. All you have to do is select a task, click add to favorite, and choose an emoji as an icon for your task. Save and add it to the insta list.
- How to start a break?
To start a break, go to the clipboard screen, click on break, and confirm to start. The currently running task will be paused and you will be redirected to the break screen page. You will be able to log in again or resume a task once the break is done or you can choose to return to the application for personal use only.
💡 Note: Breaks both rest and meals are set by default depending on your working hours. You will see a pop-up notification if your break time is near.
How to pause/resume a task?
We cannot pause a task to avoid inaccuracy in keeping track of the tasks. But worry not! coAmplifi provides meal breaks and rest breaks for when you need to take a break. In addition to those given breaks, there are also ‘personal tasks’ that you can start when needed.
What you have to do is you need to add a new task. The task selected will be added to the doing list on the clipboard. If a task is running when adding a new one, the current task will be listed under the added task on pause. To resume a task, make sure there is at least one task on pause and click resume. The task will start running again.
Planner
With this feature, you can plan multiple tasks in the planner and it also shows a more detailed list of tasks from doing, meeting, todo, and done lists.
Dispatch
With this feature, supervisor(s) can assign tasks to each team member to make the team more effective!
To start assigning a task, you need to follow these steps:
Go to My Office > Clipboard > Dispatch and click "+Assign Task". Search for a member of your team you want to assign the task. Choose from the task in the list, either a "Learning" or a "Business" task. Select and set a target date and then click "+Add" to save. Then, the assigned task will appear on the clipboard and planner in its corresponding time schedule.
💡 Note: The team member you assigned the task to may still need to confirm or decline the task you assigned.
Queue
With this feature, the Queue shows the waitlist and assigned tasks. You can add a task and it will remove from the queue lists once the task is started and will be displayed on the Clipboard tab. As long as you did not start a task yet, it will remain listed on the Queue lists.
You can view queue lists sorted to:
- All - lists of all the tasks you added, assigned tasks from your supervisor(s), and backlogs
- Assigned - lists of your tasks assigned by your supervisor(s)
- Backlog - lists of not yet started tasks.
Time Card Editor
With this feature, you can edit or update your completed tasks of the day.
💡 Note: To edit other days, go to My Records > Time Card Editor
Overtime
Supervisors can only authorize overtime for users. To authorize overtime, go to My Office > Clipboard and collapse "Extended workday schedule and overtime for my non-exempt direct reports." Select a team member and click the "+ New Overtime" button, then fill out the form.
What is authorized overtime?
Authorized overtime is performed so that a specific user is able to do overtime. To know that you are authorized to do overtime, go to My Office > Clipboard > Overtime tab. You will see here the lists of overtime for the next 30 days.
💡 Note: Only non-exempt users can do overtime.
Where can I view my regular workday schedule?
To view your workday schedule, go to Overtime. On the right side, a regular work schedule is indicated.
